Skip to content

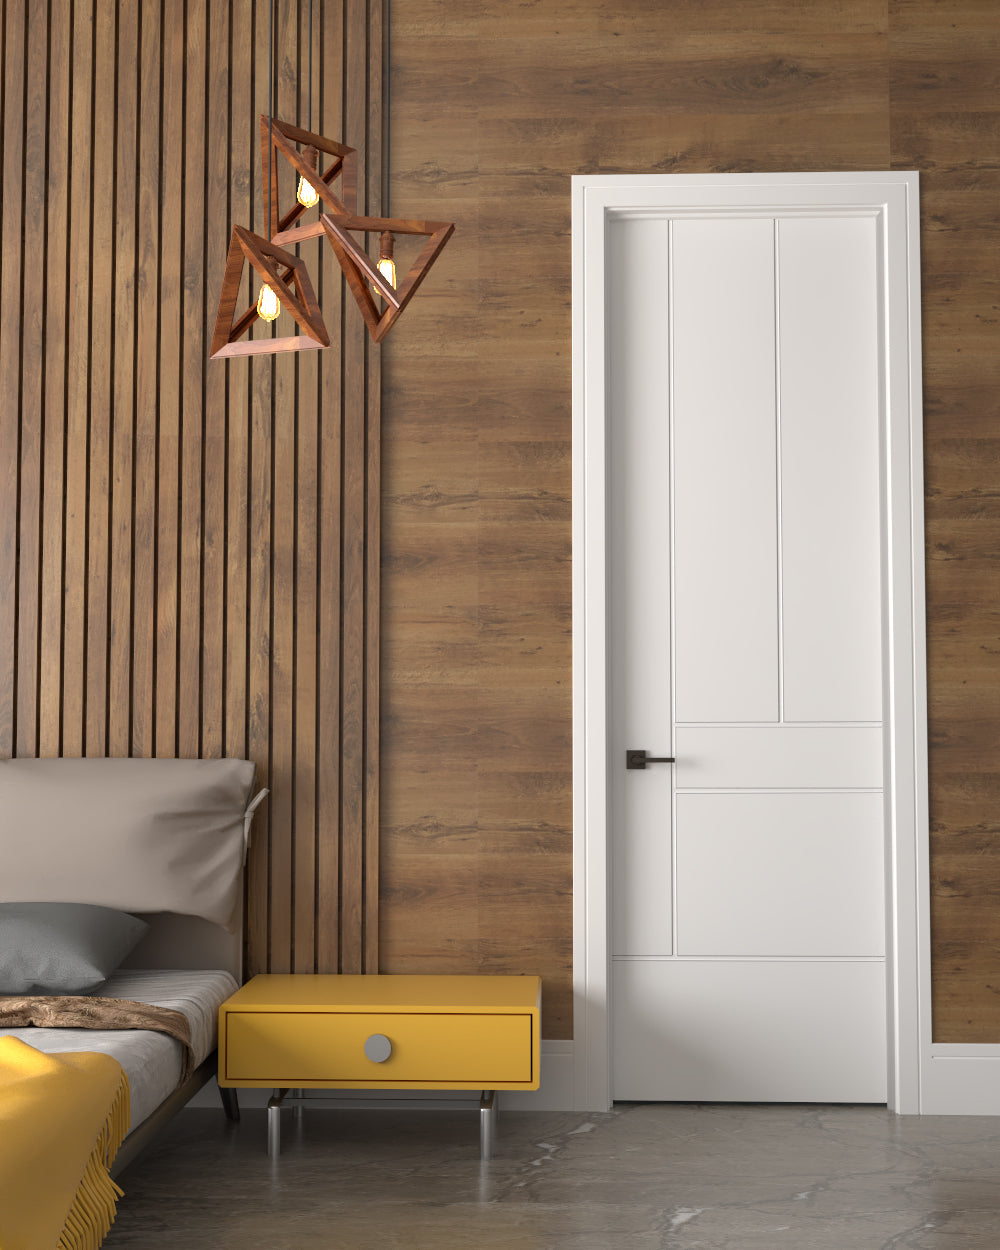
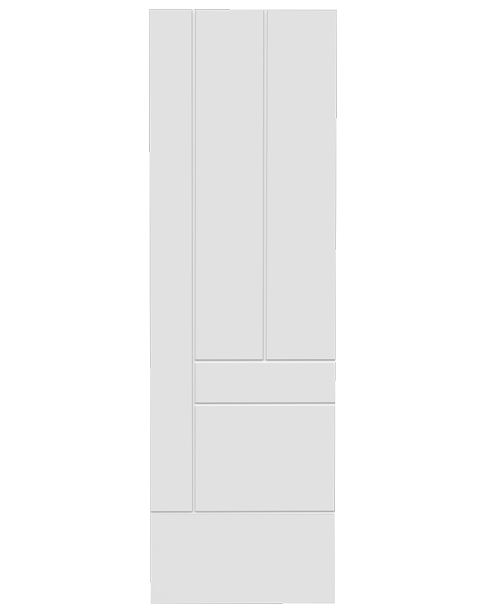
Aster Primed Carved Interior Door 8'0" (96")

  • Sleek and subtle design
  • Modern Interior Designer door
  • Carved door
  • Primed and ready for paint
Item Number     Order Size
CARVED8016-ASTER     1'6" (18") X 8'0" (96")
CARVED8020-ASTER     2'0" (24") X 8'0" (96")
CARVED8022-ASTER     2'2" (26") X 8'0" (96")
CARVED8024-ASTER     2'4" (28") X 8'0" (96")
CARVED8026-ASTER     2'6" (30") X 8'0" (96")
CARVED8028-ASTER     2'8" (32") X 8'0" (96")
CARVED80210-ASTER     2'10" (34") X 8'0" (96")
CARVED8030-ASTER     3'0" (36") X 8'0" (96")
Specifications +

Color/Finish: Primed to be painted

Material: MDF Face  

Core Type:  Particle Board Core 

Construction Type:   3 ply sandwich construction with 2 skins and a core

Sticking:      Many available                    

Panel Type: Many available                    

Bevel: Beveled 3 Degrees on 2 sides

Under Sizing: 1/8” less on width, full size on height  

Product Weight (lbs): 150 (lbs) max

Door Type: Interior Slab

Texture Type: Smooth

Carb 2 Compliant


Installation Instructions +

Needed Materials

Note! Follow all material manufacturer’s instructions for proper use and compatibility.

  • 10d Finish nails
  • 4d Finish nails
  • Shims
  • Wood putty
  • Sandpaper
  • Finishing materials
  • 100% polyurethane sealant (for two piece frames)


Needed Tools

  • Hammer
  • Tape measure
  • Utility knife
  • Level (4 ft. minimum recommended)
  • Circular saw or jigsaw (for trimming jambs if necessary)
  • Nail punch
  • Screwdrivers


1   Remove Packaging

Remove shipping materials such as corner covers, shipping blocks or pads. Note! Be sure to remove the shipping clips or screws through the header into the slab from the door before beginning the installation.


Inspect Door

  • Cosmetic damage.
  • Product squareness (diagonal measurements must be within 1/4" difference).
  • Correct product (size, color, grid pattern, handing, glazing, energy-efficiency requirements, etc.).
  • Correct Handing. To determine door swing (left or right), face the door from the side where hinges cannot be seen. Right handed doors open to the right, while left handed doors open to the left. If any of the above conditions represent a concern, do not install the door. Contact your dealer or distributor for recommendations.


2   Inspect Rough Opening

  • Verify the width and height of the door frame are each 1/2" smaller than the rough opening width/height.
  • Verify the rough opening is square. The (A) and (B) measurements should be the same. Maximum allowable deviation from square is 1/4".
  • Verify Square, Level and Plumb
  • Verify the rough opening is plumb (C, E and D). The maximum allowable deviation is 1/8".
  • The rough opening sill must not be crowned or sagged (D), but rather be level or sloped (positive slope) to the exterior.
  • The exterior face of the rough opening must be in a single plane (E) with less than 1/8" twist from corner to corner.
  • Minimum double studs should be used at all rough openings.
  • The header must be supported by trimmer studs.


Do not install the door unless the rough opening meets the above conditions. Professional assistance may be necessary to correct problems before installation.

IMPORTANT! The door should be finished either before installation or immediately after (whichever is more convenient). Note! If removing the slab from the frame for finishing, remove hinges from the jamb only, do not remove hinges from the slab.


FOR RETROFIT INSTALLATIONS

For retrofit installations remove the old door and contact your local waste management entities for proper disposal or recycling of products being removed.


3  Install Door

Warning! To avoid injury, use at least two people to install. Adequately support the door until completely fastened.

 Pre-hung doors will be either a one or two piece jamb system. One piece jamb doors come without trim applied. Two-piece jamb doors come in two sections. The inside and outside trim are already applied to the main frame. The frame section with the pre-hung door is nailed in place, then the other frame section with the outside trim slides in from the other side and fits closely to the wall. The two sections are assembled with a tongue and groove joint which is covered by the door stop.


One piece jamb systems skip step 1 and begin with step 2.

  1. If installing a two piece jamb system, separate the trim assembly from the frame section. The trim assembly may be taped or tacked to hold it in place during shipping. Frame components can be lightly primed or stained prior to installation, but wait until after installation before applying finish coats.
  2. Pre-hung door frames extend below the slab to allow for different floor heights. The jambs can be trimmed as needed before beginning installation, however make sure to leave adequate space to allow air to pass under the door according to ventilation codes.
  3. Remove any packaging or nails that hold the door closed.
  4. Position the door unit into the opening and level the hinge side of the jamb. Use shims fastened through the jamb and stop with 10d finish nails approximately 2" from the top and 2" from the bottom of the jamb to level and temporarily secure in place.
  5. Level the latch side of the jamb in the same manner as the hinge jamb. Ensure the jamb is not twisted and that the spacing between the jamb and door is uniform on all sides. Adjust the latch side of the jamb as necessary.
  6. Shim the top of the jamb in the center of the opening and fasten with a 10d finish nail.
  7. Re-check for square, level and even spacing around the door. Nail securely in place through the stop, jamb, shims and into the studs every 12"-16". Set nails with a nail punch.
  8. Position trim or slide trim assembly (two piece jamb) into place in the frame. Carefully nail the trim on both sides of the door every 12" to 16" using 4d finishing nails.
  9. After installation, replace the center screw (as shown) in the top two hinges (through the leaves toward the jamb) with the provided #9 x 2½" screws.


INSTALLATION


  1. Install lockset hardware per supplied instructions.
  2. Fill any nail/screw holes and sand smooth.
  3. If installing a two piece jamb system, run a bead of 100% polyurethane sealant in all joints and tool until smooth.
  4. Finish all six sides of the door slab as well as the frame (if not already done). Note! If removing the slab from the frame for finishing, remove hinges from the jamb only, do not remove hinges from the slab.
  5. Protect recently installed units from damage from plaster, paint, etc. by covering the unit with plastic.


SAFETY

  • Read and fully understand ALL manufacturer’s instructions before beginning. Failure to follow proper installation and finishing instructions may result in the denial of warranty claims for operational performance problems.
  • Do not work alone. Two or more people are required. Use safe lifting techniques.
  • Use caution when handling glass. Broken or cracked glass can cause serious injury.
  • Wear protective gear (e.g. safety glasses, gloves, ear protection, etc.).
  • Operate hand/power tools safely and follow manufacturer’s operating instructions.
  • If disturbing existing paint, take proper precautions if lead paint is suspected (commonly used before 1979). Your regional EPA (www.epa.gov/lead) or Consumer Product Safety Commission offices provide information regarding regulations and lead protection.
  • WARNING: Drilling, sawing, sanding or machining wood products generates wood dust, a substance known to the State of California to cause cancer. Use a respirator or other safeguards to avoid inhaling wood dust. MATERIALS AND DOOR HANDLING
  • Allow doors to acclimate to local conditions for at least 24 hours before finishing.
  • Make sure the slab is secured prior to installation.
  • Heed material manufacturer’s handling and application instructions.
  • Do not put stress on joints, corners or frames.
  • Store door in dry, well-ventilated area in vertical, leaning position to allow air circulation; do not stack horizontally or drag on the floor.
  • Protect from exposure to direct sunlight during storage.
  • Install only into vertical walls and when conditions are dry.

IF INJURY OCCURS, IMMEDIATELY SEEK MEDICAL ATTENTION!

 Installation Instructions

Care & Maintenance +

PRECAUTIONS, SAFETY & CLEANING RECOMMENDATIONS


  • Never mix cleaners or solvents. This may be dangerous as well as ineffective.
  • If using commercial cleaning or finishing products or solvents, carefully read and follow safety instructions, warnings, cautions and disposal instructions on manufacturer’s labels. Wear appropriate safety gear (e.g. clothing, goggles, gloves) and provide plenty of ventilation.
  • Immediately clean spills.
  • Most solvents are flammable and/or toxic and must be handled with extreme care. Do not use near open flame, sparks, or electrical motors.


RECOMMENDATIONS

  • Do not power-wash doors or use a garden hose; this can cause seal failure in glass units and allow water to enter the structure.
  • Avoid using metal tools, razor blades, or other sharp objects and abrasive cleaners. They can damage door surfaces, scratch glass and remove coatings.
  • Do not allow aggressive cleaners to come into contact with door surfaces. Immediately rinse and dry.
  • Do not allow cleaners to puddle or collect at glass edges near glazing materials.
  • Avoid cleaning in direct sunlight or in temperatures too hot or too cold.
  • Avoid excessive rubbing and over-cleaning. • Do not scour.
  • Clean and rinse one area at a time.
  • Clean twice a year (monthly in coastal areas) or when dirty.
  • After-market tints and films are not recommended on glass, as they may cause damage to the glass and/or sealant.


MATERIALS


  • Baby shampoo or mild soap and water. • Several clean, soft, non-abrasive, absorbent lint-free dry cloths (cleaning).
  • Commercial glass cleaning products or solvents.
  • Plastic wrap (for label removal).
  • High quality sealant (100% polyurethane if painted and 100% silicone if left exposed).


TOOLS

  • Soft bristle brush
  • Spray bottle
  • Sponge
  • Plastic putty knife (for paint or label removal)


 BASIC INSPECTIONS & MAINTENANCE


SLAB AND FRAME INSPECTION

  • Inspect annually (due to the corrosive environment of coastal areas, inspect monthly).
  • Inspect stiles and rails for damage (excessive warp, cracks or splits in wood or fiberglass surfaces, dents or scratches in metal surfaces).
  • Immediately repair scratches or cracks in painted or finished surfaces. Re-finish surfaces as necessary when finishes fade, crack, peel, split etc.
  • Inspect stile and rail wood doors for crooked panels and/or mullions. These can be gently tapped with a wood block and rubber mallet until straight. Panels can also develop “light lines” around the perimeter from shrinkage. These areas should be touched up with a matching finish. Allowing the door to “condition” in a warm, dry environment for 24 hours before touch up will yield the best results.
  • Check glass for cracks. If cracked, call us or your local glass supplier for replacement.
  • For insulating glass units, look for moisture or fogging between glass panes (most likely to occur on cold mornings). This may be an indication of seal failure, call us for recommendations.


GENERAL CLEANING

Prepare cleaning solution (1 tsp. baby shampoo or mild soap to one gallon of water).

  1. Rinse surface with clean water from top to bottom.
  2. Apply cleaning solution with a sponge or soft brush with uniform pressure horizontally, then vertically.
  3. Promptly rinse thoroughly with clean water (sponging while rinsing may be helpful; do not allow cleaning solution to dry on the surface or collect and puddle).
  4. Wipe dry with lint-free dry cloth.
  5. If necessary, repeat steps above until clean. 6. Dry door with separate cloth.


LABEL REMOVAL

Slowly peel from one corner. If label tears or sticks, moisten with soapy water and gently scrape with plastic putty knife. Stubborn labels can be soaked with soapy water and covered overnight with plastic wrap. Gently remove with plastic putty knife.


PAINT REMOVAL

  1. Soak dried latex paint drips with warm water and baby shampoo solution. For oil-based paint, consult a paint professional. 2. Wipe with damp cloth or sponge. If needed, 3. Scrape gently with plastic putty knife. Repeat soak and scrape. 4. Repeat if necessary


STUBBORN STAIN REMOVAL

Commercial glass cleaning products may be necessary. • Apply small amount directly to the stain. Avoid spilling or dripping down the glass. • Some persistent stains may need higher strength cleaning solutions that contain active ingredient chemicals such as denatured alcohol or acetone. Special care must be taken when using these types of cleaners. • For oil and grease: try baking soda and water


Cleaning and lubrication help to maintain and restore smooth operation to movable parts such as hinges and locksets and, in most cases, offers some corrosion protection.


Clean door surface and maintain hardware any time doors are not opening or closing properly or at least biannually (monthly for coastal areas):

  • Clean dirt/debris with mild soap and water and rinse clean
  • Tighten loose screws
  • Replace damaged hardware


PRECAUTIONS

The following substances may damage protective finishes.

Do not use:

  • Vinegar-based cleaners (use on glass only)
  • Citrus-based cleaners (lemon, etc.)
  • Paint removers
  • Window cleaners
  • Brick/siding washes
  • Any other industrial or abrasive cleaners


  1. Lubricate hinges with light oil (3-In-One® oil or equivalent) annually or when noisy.
  2. Spray keyway lock with graphite lubricant.


FOLDING DOORS

Tracks and Bearings Wipe visible track surfaces with a damp soft cloth and a mild detergent, then wipe dry with a clean cloth. Using a suitable applicator spread a small amount of clear petroleum jelly or similar lubricant where the carrier wheels pass so that it is distributed evenly along the track. Place additional lubricant around the bearings. The lubrication reduces wear, improves operation and protects against corrosion. In severe environments, apply a thin film of WD40®.


HANGERS, PIVOTS & BRACKETS

Exposed surfaces should be wiped down with warm soapy water and a soft rag, and then rinsed clean before applying new surface protectant. A light spray application of WD40® , followed by a light wipe with a dry cloth to remove any excess.


HINGES

 Wipe down the visible surfaces with warm, soapy water and a soft rag, then rinse off and dry by wiping with a clean rag. Application of a thin film of WD40® will help maintain the original luster of the metal finish, and lubricate the moving contact surfaces. Be careful not to get these compounds on any wood components as it may cause staining. For oil-rubbed bronze finish, care should be taken when cleaning or reapplying surface protectant.


FLUSHBOLTS

Spray WD40® to the sliding pin inside the bolt and to the lock cylinder. There are access holes or slots on all drop bolts so that this can be completed without removing the locks from the doors.

Return Policy +